


Of course, being only 2 years old, she's a little hard on the game. Since I'd kind of like to see the board game survive until she's actually old enough to play it the real way, I decided I needed to come up with a more toddler friendly version.

As you can see, its a very simple game. But I think thats best for my kids right now; simple yet durable!
Here's how I did it:
First, I stole a stack of paint chips from Fred Meyer's. I felt so guilty! But, I figure I'm a pretty loyal FM shopper (they're the closest store to us, so we run there for "one little thing"all the time!) so its not exactly stealing.
I chose 5 colors and grabbed 6 paint chips of each color. I SHOULD HAVE DONE 6 COLORS, AND GRABBED 5 OF EACH COLOR. You'll see why later.
Setting aside one of each color, I laid the paint chips out in a kind of path, then cut out a rectangle of felt that would be big enough to lay the path on.
Next, I used a little blob of Tacky Glue to secure the squares exactly where I wanted them.

I only put it in the very middle of the card.
Then I held the card down for a bit, and let them all dry for a bit.

I admit, I was sorely tempted to just leave the cards like this, but visions of my Munchkin and Monster peeling them off one by one and throwing them all over the room popped into my head, and I knew I'd need to do something a little more heavy duty.
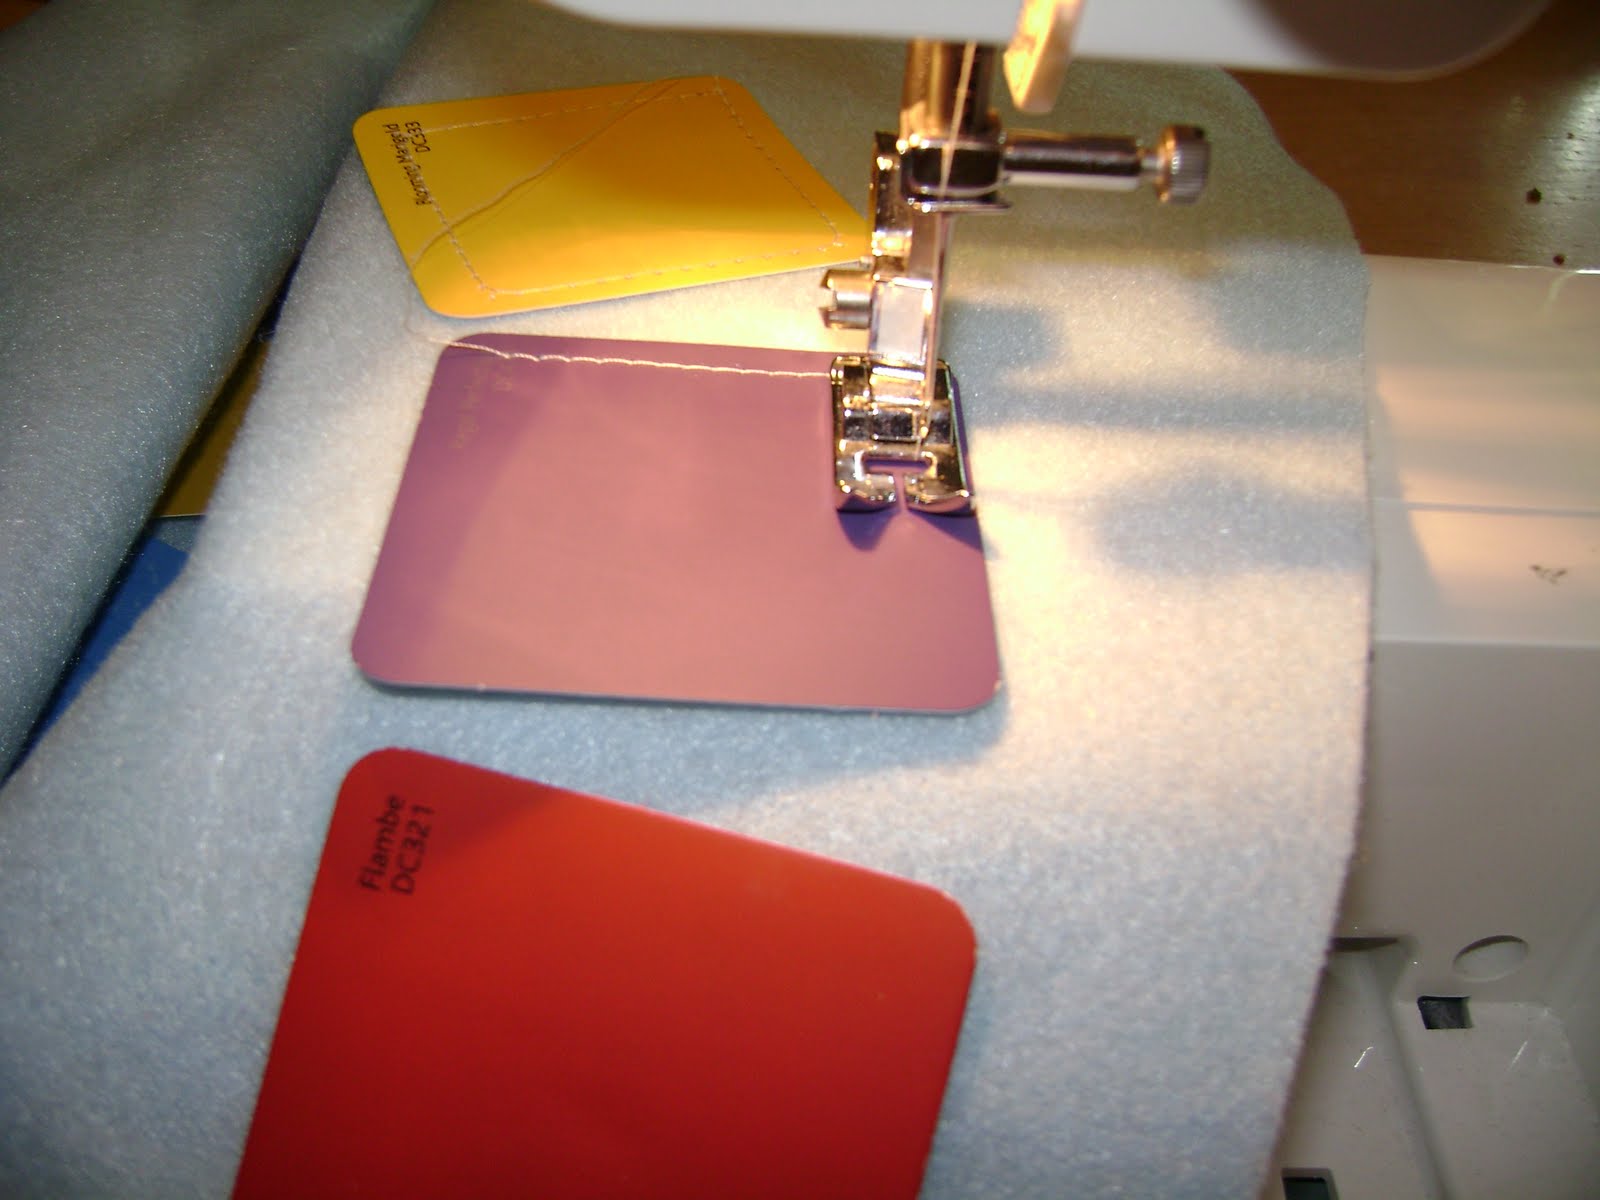
So, I sewed them on. Each and every card. (Kind of tedious to me just sewing squares, which is exactly why I'm not a quilter!)
For the "start" and "end" pieces, I took a paint sample that had two shades of white and cut it in half, then wrote with a fine point sharpie, then sewed them on.


I decided to back my "board" with fabric from an old knit sheet. I cut a rectangle the same size as the felt and then pinned them with right sides together. It was a fitted sheet, so I also cut a length of the elastic edge and folded it in half, pinning it in the middle of one of the short sides with the 'loop' part being down between the felt and the sheet.

I sewed around the edges, leaving a gap about 6 inches long. I turned it right side out (the reason for the larger gap is so to make it easier to get the cards through without bending them) and topstitched around the edge.
For the tokens, I made a mini Munchkin and mini Monster (shown below, although I guess my Monster actually has blond hair, hmm...). I cut out a cardboard figure (from a cereal box), then covered it with felt to make it look like a person.

I used the lid from a baby food jar, turned upside down, for the bottom. Here's a close up of the feet:

I cut a slit in the feet of the figure, then took a strip of cardboard and slid it in crosswise. Both the figure and the bracing strip fit very snugly into the lid; to do this I made sure to cut them too big to start with and then trimmed it down a little at a time until they fit just right.
Instead of using a deck of cards like Candyland (although that would be easy to do, just steal take all the paint chips the store has), I decided to make a cube to roll. Kind of like a die, but bigger - perfect for little hands.
This is why I should have done 6 colors....because a cube is 6 sided! DUH! Not quite sure where my brain was...but anyways. Instead, I took another white card and cut it down to the same size as the colored squares. I wrote "Roll Again" on it...we'll see how that goes over with my Munchkin.

I used the biggest zig-zag stitch my sewing machine had. The cards are lined up side by side, no overlaping, so that once you stitch it they're attached together, but can still bend. Make sense? No? Well, my camera really wasn't cooperating, so this is the best pic I have:

If you've never made a cube before, then this may not make sense, and again I dont have a pic because my camera refused to turn back on. But when you sew the 6 cards together, you make it kind of like a cross. 4 of the cards are lined up vertically, and then the other two are on the left and the right of the second card from the top. I'm so sorry I couldnt take a pic!
After I finished sewing them into the cross, I realized I would have to hand sew the other sides. You should be grateful about the lack of pictures at this point, because I am a TERRIBLE hand stitcher! Oh, it is rather ugly...but my toddlers wont care.

And, truth be told, I'm thinking I might go get more paint chips and make a spinner-type thing instead. We'll see.


(here's the game, rolled up for storage...thats what that loop of elastic is for, in case you're wondering)
So, there you have it. I know its a pretty terrible how-to...I've got a fussy newborn that likes to make things difficult!
After naptime we'll see if it passes the real test...if it survives more than 24 hours, I'll know its a winner!!!!


I made it to the Top 10! Vote here!


Wow - what a cute game. I love all of the pieces that you made too!
ReplyDeletexoxo
Jen
Adorable game. I love that it is Toddler friendly!
ReplyDeleteGreat idea!
ReplyDeleteWhat a cute and great idea! I love the little felt people you made! Genius!
ReplyDeleteI really like how you made the tokens. Very clever.
ReplyDeleteSo creative! Love that you used the paint chips! Please come link up with me for Make it Fantabulous Friday!
ReplyDeleteJoy
mommaskindacrafty.blogspot.com