Friday, April 1, 2011

Giveaway Winner!

My apologies to anyone who might be waiting for the template and tutorial to the Stacking Puppets...I got slammed with a nasty cold earlier this week and I'm just now starting to function again.  I'm hoping for Monday...so plan on Tuesday. :)

The winner of the Princess and the Frog Stacking Puppets set is....

Comment #10:

Destiny said...
Geez these are DARLING! Follow your blog already- in fact- linked you on my blog and featured your Doll book and my attempt to make it! :) gotadd.blogspot.com

(Winner chosen by random.org...but I'm really too tired to figure out how to get the actual image onto my blog, so you'll have to take my word on this one, k?)

Destiny, I'll be emailing you soon!


Was anyone the least bit curious about the oddball time that this giveaway ended?

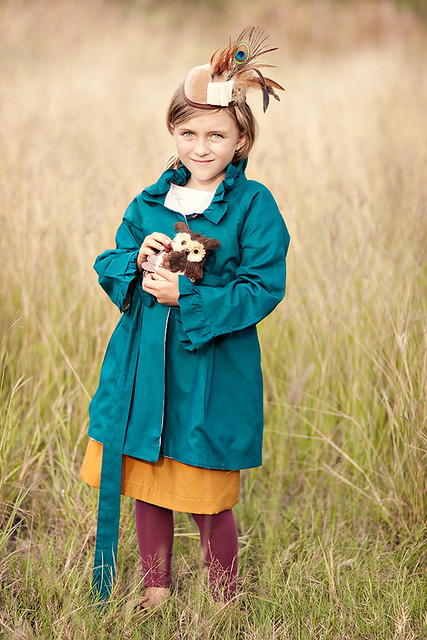
Well, it just happens that 7:35pm is the exact time that this Little Miss was born 3 years ago!
Yes, she's my April Fools baby...the funniest part is, April 1st was my due date!  Most people didnt believe us when we called to tell them we were really in labor and at the hospital. (But I am SO GLAD she came when she did...she was 9 1/2 pounds!  I was sore for a loooong time, let me tell ya!)

When I was little my mom always made us a Birthday Outfit, so I tried to do that this year.  But, being sick, I kept making mistake after mistake after mistake!  I think it turned out okay, as long as no one looks too closely.

Her favorite part is the pockets...perfect for her pennies that she earns for doing chores, or the flowers that she picks off Nana's tree.


This is her smile-while-squinting-in-the-sunlight face. 
Her mischevious face looks a lot like this too, strangely enough.


Tomorrow is her birthday party (combined with her little brother and cousin) and I have a load of stuff to do...like decorate the cake, for one.  Kind of important.  I'll make sure to post pictures

tomorrow.  Or probably next week, at the rate I'm going.

Monday, March 28, 2011

Bookshelf Puppet Theater, Stacking Puppets, and a GIVEAWAY!

Hello and Welcome to all you T Shirt Diaries readers!

Are you loving this Spring Stashbust as much as I am?!  It feels so good to be whittling away at my stash of stuff, instead of constantly replenishing!

Today I'm going to be sharing my Bookshelf Puppet Theater, as well as the Stacking Puppets I made to go with it.  Oh, and my very first GIVEAWAY.  Woo Hoo!

***********

You know how you think you've come up with the most genius idea in the history of the world, only to discover that somebody already beat you to it?

Yeah, this is one of those times for me...kinda.  After I came up with the idea of a Bookshelf Puppet Theater, and even sketched it all out, I happened to do a Google search, and found this tutorial on Infarrantly Creative.  Of course, her bookshelf was a little different, so I still had to put my thinking cap on to make this work.

This is what I started out with:

Does it look like its missing something?
Like...shelves maybe?

This is a $20 assembly-required bookshelf we bought at Big Lots a few years ago.  Its made from pressboard, and has those little metal peg things that you stick in holes on the side and then set the shelf on top of the pegs.

I made the mistake of putting it in my toddlers' bedroom.  Less than half an hour later it was stripped...and the worst part is that they hid the metal pegs and I have yet to find them!
So, the first thing I had to do was make a SECURE shelf.  I used some blocks of wood I found in our shed to nail to the inside of the bookshelf, like this:
(We don't own a saw, or really any tools other than a hammer and screwdriver, so these blocks of wood are a wee bit longer than the bookshelf.  I just made sure it sticks out in front, so it won't be jabbing my kids while their putting on their shows.)

Next I set the shelf on top and nailed it to the blocks of wood.  I admit - despite my best efforts it did not end up completely level.  But my kids aren't complaining, so neither will I :)

I also hammered a nail on each side, right near the top, letting it hang out a bit.  This is where the curtain "rod" will be later.
After a couple coats of grey paint (leftover from painting bedrooms!), I added a flannel board front.  And of course forgot to take pictures of the process, but its pretty straight forward.  Using the backing from the original bookshelf (it was flimsy, a little bit better than cardboard though) I cut it to fit in the front.  I covered it with yellow flannel, folding the edges over to the back and hot gluing them down.  Then I nailed it in place. 

Now one of my kids can use their Felt Faces and other felt cutouts on the front while the other is putting on a show up above!

The curtains were made from some black and white checked cotton fabric I've had for a couple of years.  I made strips from the yellow flannel to glue on the side.  It forms a loop and velcros on itself to keep the curtains back.

The curtain "rod" is a wrapping paper tube painted white.  I was scrambling all over the house, trying to find something I could use to hang these curtains from so I wouldn't have to break my Stashbusting oath, and finally I had this stroke of brilliance.  I had to cut it a little shorter, and put a slit in one end so I could slide it over the nail, but it is surprisingly sturdy, considering its just cardboard.

And there you have it...the Bookshelf Puppet Theater!

But, if you have a puppet theater, you really better have some puppets too, right?!

I ran across these fantastic nesting puppets on Sacred Dirt.  Seriously, hop on over there and take a look...I'll still be here when you get back. ;)

Anyways, my Munchkin will be turning 3 soon and since she is FINALLY into Princesses I thought I'd make her a set of Princess and the Frog puppets as a birthday present.


I admit, this first attempt is not the prettiest thing ever.

But the puppets were a BIG hit!

My Munchkin loved how she could stand them up...lay them down....


...or slip them on her hands so they could hug.


I'll be posting the template and tutorial for these stacking puppets in the next few days, so won't you pop on back and check it out?

But wait! 

I have one set of Princess and the Frog Stacking Puppets to GIVE AWAY to one lucky person out there!


(see? They fit inside each other, perfect for compact storage!)


How to Enter:
-Leave me a Comment.  Any comment, although preferrably something happy.

Additional Entries:
-Follow my blog.
-Go on back to The T Shirt Diaries and tell Robin how awesome she is for hosting this Spring Stashbust.

***Please leave a separate comment for each entry, for a total of up to 3 entries, and if you don't have your email address linked to your profile, please leave it in the comment.


THIS GIVEAWAY WILL CLOSE AT 7:35 PM (PST) on FRIDAY APRIL 1ST.

Sunday, March 27, 2011

Mary Poppins Growth Chart

We've had this piece of wood laying around for who KNOWS how long, and in honor of the Spring Stashbust, I figured it was time to do something with it!

I painted it yellow and then spent over an hour carefully marking every half inch - anyone that knows me, knows how difficult that was for me!!!!

I painted some black lines and numbers, and before I knew I had...
...a Mary Poppins Growth Chart!

Mary Poppins is one of my kids' favorite movies, probably because of all the awesome dancing.  But what makes this a Mary Poppins Growth Chart and not just a big yellow ruler?

Why, this....

My husband and I are only about an inch apart in height (he's 5'10" and I'm 5'9") and I figured my kids are so short that wont be able to tell if we're faking it a bit.

Tuesday, March 22, 2011

Toddler Tuesday - Felt Faces

Sundays are always a challenging day around here.  Church starts at 9am, which is just about the time my kids are ready to be running around and playing.

So, I've tried to find some creative ways to keep them entertained and (mostly) quiet. 

 Using my huge stash of felt, I cut out a variety of shapes like circles, triangles, squares, etc.  Originally these shapes were meant for a quiet book, but during one tantrum that involved felt pieces flying everywhere, we discovered that they will stick to the back of the pew in front of us!  My kids love lining up the shapes, and my daughter is old enough to start sorting them by color or shape, so its an educational activity too.

This last week I made them Felt Faces.


One for each of them, of course, since they still aren't big on sharing.  (They grow out of that stage, right?!)

This was a quick and easy project, I cut it out while watching a TV show with my Man (Monk, if you were wondering).  I glued the eyes together with Tacky Glue, but everything else is just cut.

Both my toddlers were excited to try it on Sunday.  My 3 year old did pretty good getting the body parts in the right place; my 2 year old did more of the Picasso thing.  But hey, it was entertaining for a good 10 minutes, which is quite an accomplishment for him!


I know technically I did this project before the Spring Stashbust started, but it is busting my Stash, so I think it counts!


Sunday, March 20, 2011

Once Upon a Thread - The Ugly Duckling


Katy at No Big Dill has been doing a really neat series this month called Once Upon a Thread.  Its all about kids clothing and activities inspired by children's books!  If you haven't already, go check out her blog and all the fabulous guest bloggers she's had this month.

I've had so many ideas of book-inspired outfits, but as usual many a mishap has happened along the way, so all I have to show (so far) is my interpretation of The Ugly Duckling by Hans Christian Andersen.

The Ugly Duckling feels sad and out of place among her yellow feathered companions.


Then, one day, she realizes that she isn't a duck at all...

Her feathers are sleek and white...

And she's happy to discover that she is, in fact, a Beautiful Swan!
(this is her Happy Face)


 The grey Ugly Duckling Cape was made from upcycled t-shirts.

The Beautiful Swan dress was made from an upcycled lace tablecloth (lining made from a white sheet).  A black broadcloth sash helps the dress look less baptism-y.
The headband is a white store-bought headband with feathers, ribbon, and a big white button glued to the side.  Nice and easy!
The best part about this outfit...its perfect for twirling!

Thursday, March 17, 2011

Spring Stashbust!


Robin over at The T Shirt Diaries is hosting a Spring Stashbust - and I am so in!!!!  My craft room is overflowing (see a pic here) and I've got a busy month or so ahead of me...two birthdays, one wedding, Easter, and Earth Day of course! 


So many projects, so little time!

And, to make this Spring Stashbust even more exciting (for me, at least)....I'll be guest posting on one of the days!

Go on over to the TShirt Diaries and sign up for the Spring Stashbust, and stay tuned for a lot of fun around here starting...next week.  (Lame, I know.  But our family is just now getting over almost a month of being sick, so I intend to get outside and do some yardwork this weekend!)

Wednesday, February 23, 2011

Ruffles make me happy

I think I've found a new crafting idol.  Kelly from Sewing in No Man's Land is absolutely fantastic!!!  Chances are, if you're bothering to read my lil' blog you've already heard of her...if you haven't then get on over there!  Seriously, it is THAT fantastic.

Especially because she does everything on very limited resources - not doesnt-have-money-to-buy-designer-fabric, but she lives in a very remote place (East Timor - yeah, I had to look it up on a map too) and simply cannot run to the store and buy what she wants!  She took 15 yards of fabric with her when they moved there - amazing!

Anyways, when I saw this finale for Project Run & Play, I fell head-over-heels in L.O.V.E. 
Oooh, just looking at it gives me tingles all over.  That jacket especially has me dreaming in turquoise!

Sadly, I don't have any turquoise in my stash.  Hardly any vibrant colors like this at all...but when I went thrifting the other day there was some pea/avocado/lime-ish green fabric that practically had a halo glow and hallelujah chorus surrounding it on the rack.  AND, it pretty much matches this beautiful floral cotton I bought last year at Joann's and have done nothing with.

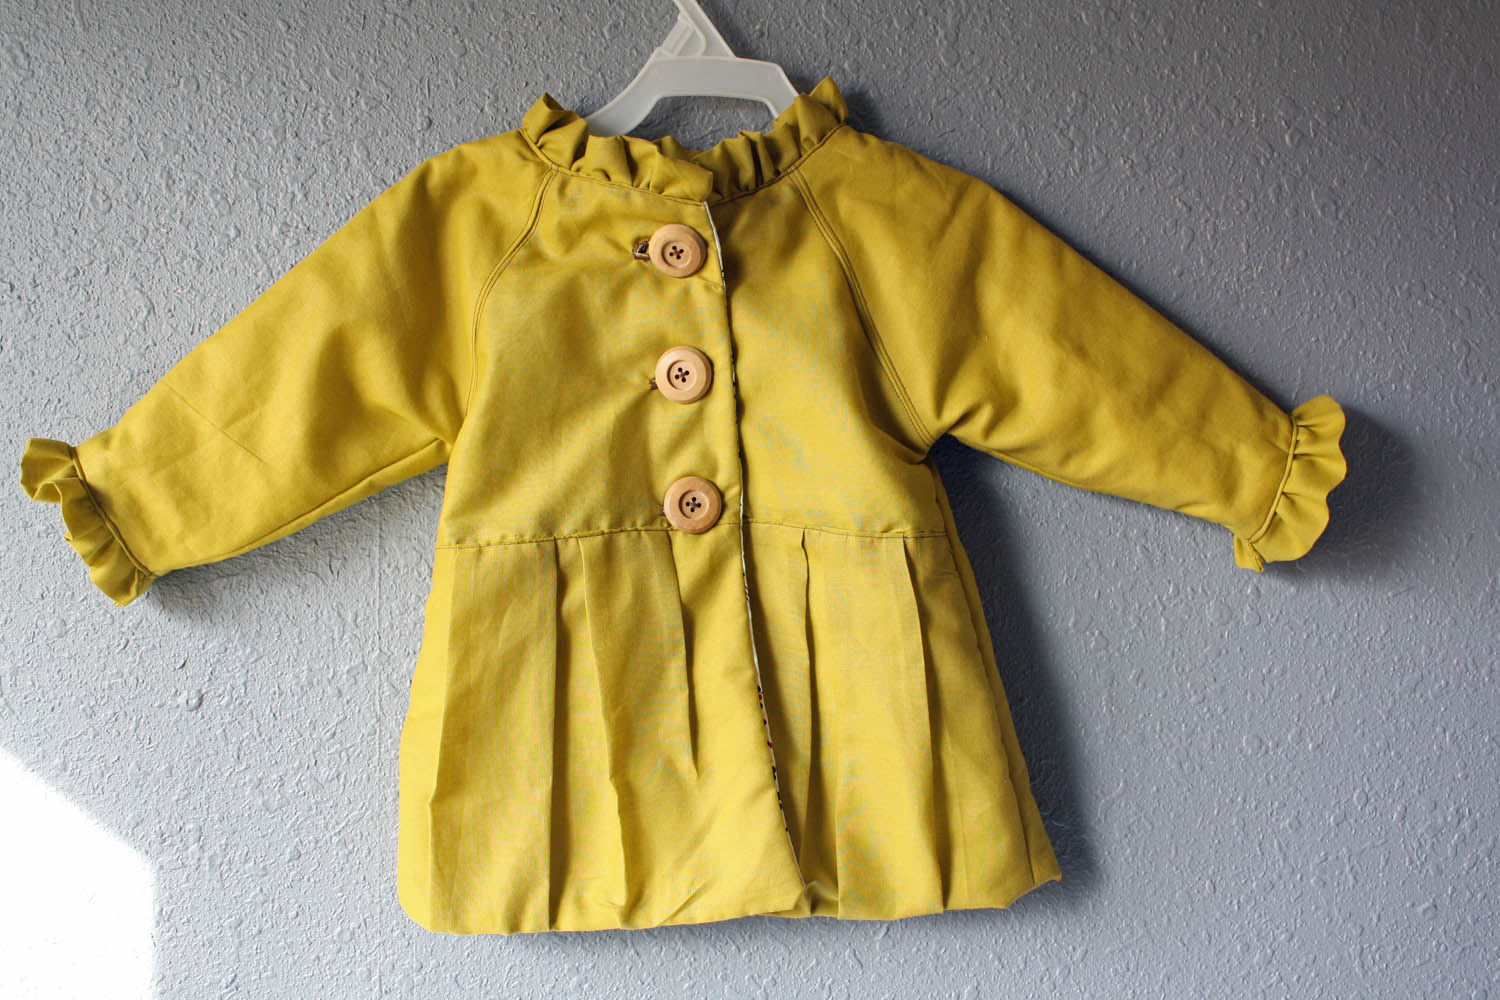
So, for less than $5, I give you my 'knockoff' of the Petite Chouette jacket:

 I know, a bit of a let-down after gazing at Kelly's amazing goodness.  But I was too impatient to wait for a tutorial or pattern or anything, so I was just winging it.
I also didn't have enough of the green fabric to make a 5t size for my daughter.  But, I am such a slacker that I STILL havent finished some Christmas presents.  So when my sister-in-law sent me the link for this outfit (after I'd already been drooling over it) I knew I should make it for her almost one-year old daughter.  (Thats why I left off the belt loops and tie - I figured they'd be a little pointless for someone that little.  And maybe it was getting a little late and I wanted to go to bed.)

I'm hoping this is about a 2T - I used some of my daughter's old clothes to make the patterns from. Crossing my fingers that this will fit her this fall!

I've decided, if I do no other sewing each day, then I need to at least ruffle something.  Seriously, just making these ruffles made me giggle like a school girl...I'm so tempted to make a jacket for myself, to wear when I'm having a bad day!