Showing posts with label kids. Show all posts

Monday, November 1, 2010

Halloween costumes

ALL THREE kids are down for naps...HALLELUJAH!  This NEVER happens, not all at the same time, so I fully intended to use my time wisely...by taking a nap myself!

But first, I wanted to throw up a quick blog about our Halloween costumes.

Since we are a family of 5 we went as THE INCREDIBLES!

I dont have the best pictures...it was a crazy afternoon/evening with a crazy amount of last minute costume making.  Theres a lot of things I would do differently if I had more time...the biggest one being put a REAL waistband on my costumes, not just the hem of a black shirt!  I had to safety pin my pants to my shirt and pray really hard that everything would stay in place!  (Which, considering I've had three kids in the last three years, was praying for a miracle.)

Hubby and the Munchkin

Dash (SO appropriate, my Monster was EVERYWHERE and that was before he got any candy!), ElastaGirl, Violet, and Mr Incredible, who is giving Jack Jack his binky.  Thats the closest we got to my Monkey being in a picture; he was so good he slept almost the whole time!

For Jack Jacks costume, I took one of my Munchkins old Pink sleepers and dyed it red.  Since it had bunnies on the front, I took a piece of white T Shirt and painted the "I" emblem on it and glued it to the sleeper.

For Dash, I bought a red long sleeve shirt and red (girls) leggings from Walmart, like $3 each.  If I'd had more time/energy/less kids to haul around I could have found these cheaper at thrift stores perhaps, or found what I REALLY wanted: red thermal underwear!  But these worked fine.  I painted the emblem on the shirt with fabric paint, borrowed a pair of black socks to put over his tennis shoes (he kept slipping on non-carpeted floors, it was really funny!) and made some black "underwear" out of a maternity t shirt.  (I LOVE cutting up my old maternity t shirts!)  Oh, and I took a strip of black fabric and stitched it around the neck.

(She INSISTED on posing like this.  I think we may have trouble with this one as a teenager!)
For Violet, I did almost the same as Dash, except instead of leggings I had to buy tights because they were out of red leggings in her size.  Shes also wearing the yellow sash, which my Monster WAS wearing but managed to pull off at some point.  For the black underwear I actually had an old pair of leggings from my youngest sister that I cut the legs off.  I had planned to use the legs for the high "boots" that Violet wears, but SOMEBODY wanted her pink polka dot rain boots.  Oh well.

For ElastaGirl and Mr Incredible, I made the pants out of two ginormous red tshirts that were on clearance at Walmart.  My black "underwear" were from the old maternity shirt, Hubby's were a pair of black leggings that I never wear.  The legs of those leggings made my "boots" (I turned them around and used the cuff as the top so I didnt  have to add elastic.  I just had to bring it in lower on my leg, which was easy enough.)  The "boots" for hubby were the sleeves of the maternity shirt.

My shirt was a white one I've had for years and had plenty of stains.  I bought Hubby a white shirt at Walmart because I was running out of time and energy.  I dyed both mine and Hubby's, then of course painted the emblem on.  Am I forgetting anything?  Oh the yellow belt thing is knit ribbing I found at Goodwill awhile back.  I made an actual waistband for Hubby's costume using the elastic from an old pair of maternity pants, but like I said I ran out of time to do mine!

I hate looking at these pics, because of how unflattering this costume was on me!  Not that I'm gonna be too hard on myself...its kinda expected to still have a tummy less than 3 months after giving birth - especially when its your 3rd kid!

And you know, being ElastaGirl, some parts are more stretched out than others! :)

Tuesday, May 18, 2010

Kid's Cushions - ala Living With Punks

I have a 2 year old and a 1 year old.

Sometimes they're best friends. 

Most of the time, they fight over everything. 

 My little Monster likes to tease his big sister and knows all the right buttons to push!  He really likes to play with "her" rocking chair and "her" bean bag chair.  (They're only "hers" because he's been too young to care about them before; we pretty much have a rule that you have to share everything except your special blankie.  As you can imagine, this rule is not going so well for my little Munchkin.)

Recently I came across this tutorial from the blog Living With Punks. And I thought, if I make one for each kid, and give it to them at the same time, they can each have their own little cushion and stop fighting.  (HA!)

I did a few things different from the tutorial.  First off, I didnt use Home Decor fabric.  Why?  Because I'm cheap.  There was no cute Home Dec fabric on clearance, and on sale the cheapest was almost $7 a yard.  Plus, I found the CUTEST boy fabric in the clearance section, $3 a yard, and I just had to have it but I have a rule that I only buy fabric if I have a specific project for it.  So I figured I might as well!

(In hindsight, I think Home Decor fabric is definitely the best choice.  Its heavier so it helps the cushion keep its shape better I imagine.  But I still love the cushions I made, even if they are a little lumpy!)

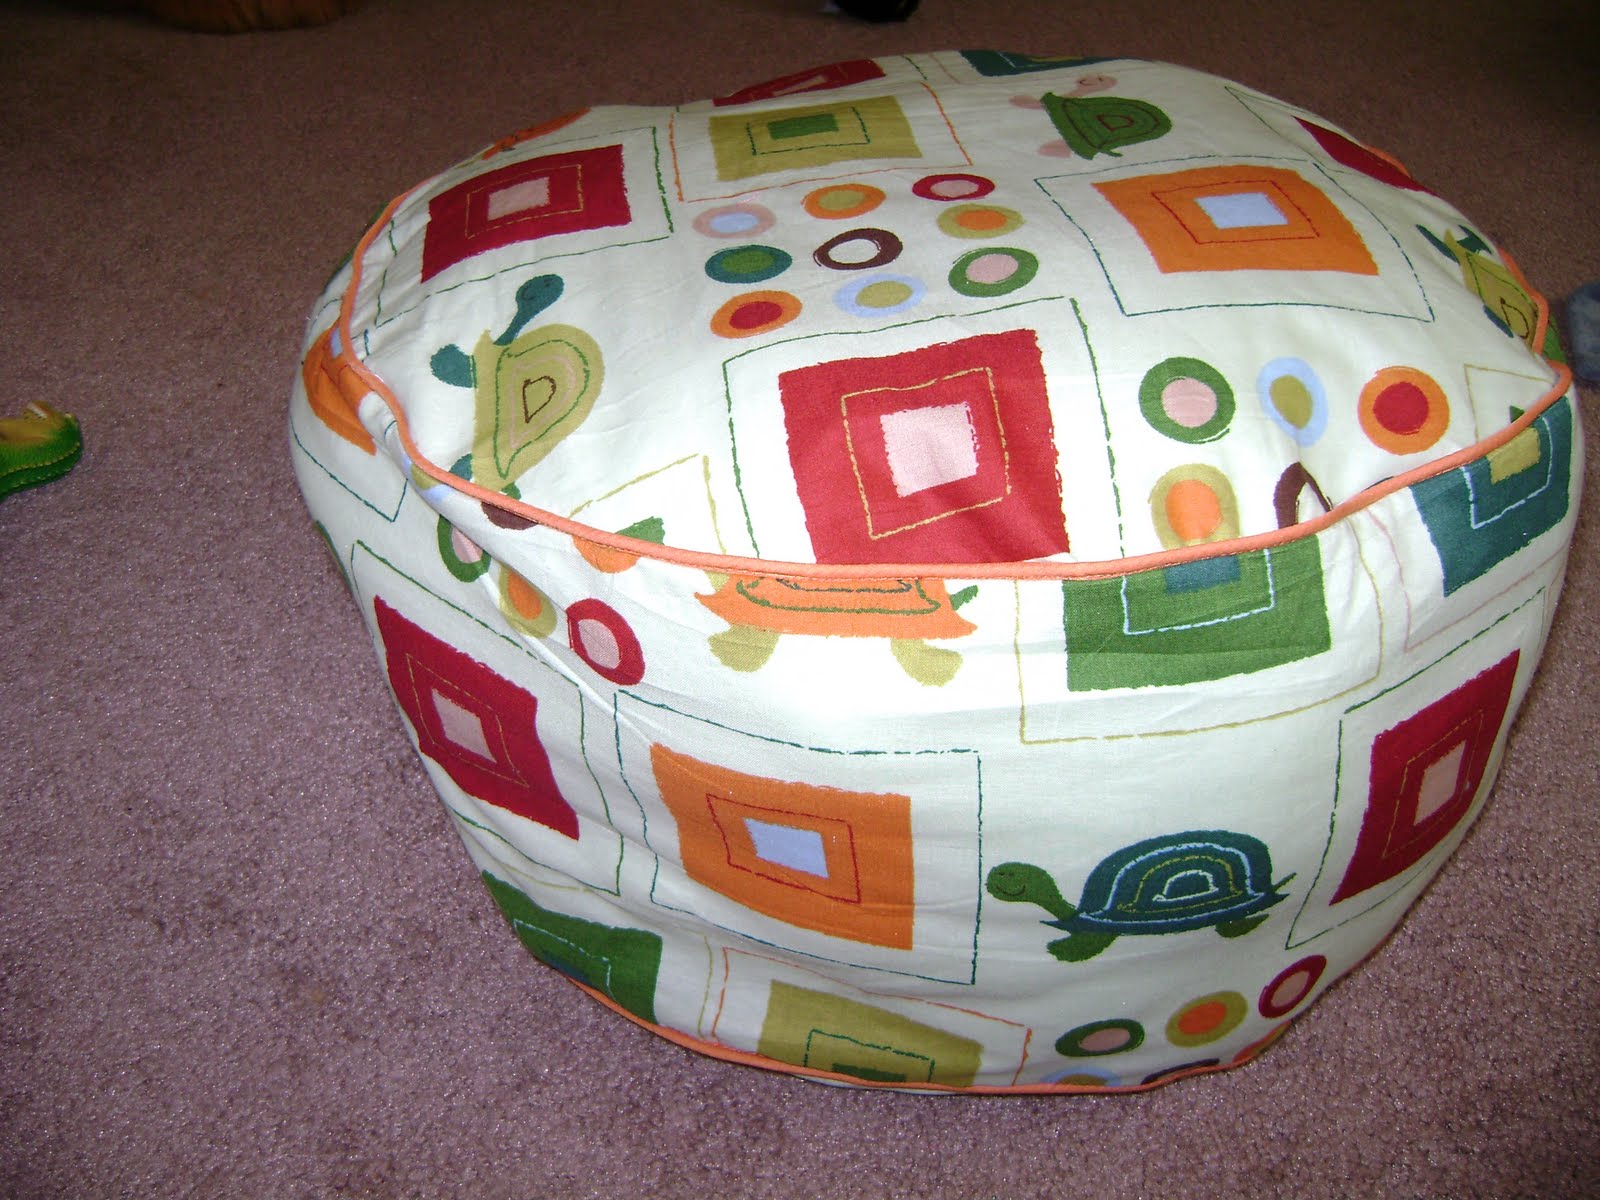
I also only used piping on the second one I made, because the cost for piping was more than I paid for the fabric so I wanted to try it without the piping and see how I liked it.  So the brown with flowers doesnt have piping, and its okay; but the turtles is WAY better!

Luckily for us, our clothes basket has almost exactly 17 in diameter (which is the size given for the tutorial), so I didnt have to hunt down a compass thing and draw my own circle!  (My little Munchkin thought it was great that I put the basket on the table, and couldnt understand why I took it off.  Every time I turned away she put it back up there!)

It took a little over one naptime to make each of the cushions, and I thought they turned out pretty good.  The real test, though, is what the kids think of them.

And the verdict is....


Yup!  I think we have a winner!
My little Munchkin LOVED her cushion, she kept scooting all around the kitchen and mudroom on it (it slid really well on the tile floors.)  And she didnt try to steal her brother's at all, which was GREAT!

I showed her the handle, and the first thing she did was pick it up (like you see in the picture) and then hit her brother with it.  Niiiiiiiice.

My little Monster really didn't care too much about it either way.  He tried to use it as a step-stool, which didnt get him very far.  But if I forced him to sit on it, he would laugh and clap his hands and stay there...for a few seconds.
Here's the brown with flowers.  As you can see, no piping and its not lumpy because the kids havent touched it yet.

And here's the turtle one, with the piping.  I dont know why I couldnt manage to center the pic, or move the toys out of the background...sorry, I'm tired so thats all you're getting!
One last pic, using a lil' of my (non-existent) Photoshop skills.  I just love how cute and innocent she looks...I'm glad I could capture that brief second, because seriously it only lasts a second or two these days!!!

Sunday, April 25, 2010

Easter Tablecloth gets a second chance!

Once upon a time, a year or so ago, a lonely little vinyl tablecloth was snatched up during an after-Easter clearance sale.  It did it's best to do its duty and all that, but tablecloths are just not suited for families with little hands that can't leave it on the table, or refrain from attacking it with a fork at every meal.
 
After a good month of dedicated service the little tablecloth, worn just slightly, was folded up and shoved in a closet, awaiting a time when one day it could actually be useful.  
 
Little tablecloth, today is your day! 
One of my biggest frustations as a mother of two toddlers (holy cow, when did that happen?!) is keeping clothes clean.  I'm no Kate Gosselin, freaking out over the littlest speck of something on a shirt, but I really hate seeing my kids get food/dirt/worse-things-that-I-won't-talk-about all over their clothes.  Perhaps if I had the amazing laundry finesse that my mother-in-law does (she can get a stain out of ANYTHING!  Just don't let her near anything with her bottle of bleach) I could be more relaxed.

Or, I could get crafty and create a waterproof cover-up.

Like this one.

"Thumbs up for popsicles right before dinner, Elmo sunglasses that are almost too small, and an awesome mom who doesn't care about either!"  (Obviously, since she's just barely two, she didn't say all that, but I'm sure she was thinking it!)

(the only back view I could get)

I threw this together while my daughter was sleeping, so I just grabbed a t-shirt of hers to get an idea for the sizing.  I wish I'd made it bigger through the chest so I could have velcro-ed the back, but then again she has a tendency to suddenly "pull a Hulk" when she gets mad, so maybe a tie is the best.  I'm going to add another one at the top too.

I used a leather needle on my sewing machine because I wasn't sure how a normal needle would handle it, and my machine has gotten a lot of abuse lately so I'm trying to baby it.  Kind of.  Also, do you notice how in the back view half the ruffle has horizontal stripes and half has verticle?  That's because the ruffle was a last-minute addition...completely unnecessary but oh-so-girly.  I scrounged to get enough pieces for it that had the finished edge of the tablecloth, so I wouldn't feel the need to hem it (because it doesn't really need a hem, its not going to unravel, but hems look nicer).


I originally thought of making this hit my little munchkin at mid-thigh or so, but I'm glad I went with a longer length.  Because messes rarely confine themselves to the upper half of her body.


Success!  Look at all that popsicle stickyness, that grape stain-yness, all on the easily-cleaned surface of our little cover-up!  (Okay, not all, her hands and face were pretty messy, but hey!  Her clothes are clean!  And that's what the garden hose is for anyways, right?)  All you have to do is take a damp cloth and wipe it off.  Or if you get lazy (like me) and let it sit a bit before cleaning...alright, let it dry completely before you remember it needs cleaned, you may have to use a little elbow grease, and perhaps some running water and then let it hang dry.  Hmmm, I think this little monster is begging for me to make him one too!


Now, lest you think it took a whole tablecloth to make one little cover-up, let me show you what I first started doing with that little striped beauty.
This is our $15 garage sale high chair.  It was in fair condition when we bought it, and it was freestanding so we wouldn't have two little kids grabbing at everything at our table.  The previous owners even cleaned it before they sold it!  After just a few uses, though, the cover started showing some real wear and tear.  The worst part was the top split from the bottom, leading to this:
Mmmm, leftovers!!!!
We've used it for almost 6 months like this now, and it finally hit me that I could made a new cover!  I (briefly) considered making a cloth one that I could just throw in the wash machine, but lets be real.  I know I would wash it once a month maybe.  And my kids are too messy of eaters to wait that long between washings.

Enter lonely little tablecloth...easy to wipe off, inexpensive so if I messed up the dimensions I wouldn't be in the hole a ton of money (I briefly considered buying laminate fabric, or the vinyl stuff you put on fabric to make it laminated, but it would have cost about as much/maybe more than we paid for the high chair to start with).  Again, I used the leather needle and it sewed really well, I was mildly concerned that puncturing little tiny holes in it with a needle might lead to ripping but its holding up well.
My favorite part of the new cover is the fact that its two pieces on purpose.  I figured if I made it one piece it would probably just tear again.  So there are little elastic loops on the bottom of the top piece and the top of the bottom piece and they go nicely through a slot and over a hook that happen to be right there.  It makes me wonder if maybe thats how the cover was supposed to be to start with.  Hmmm.
I love looking in my crowded little kitchen/dining room now and seeing this lovely bit of thriftyness.  So far, I can only see one problem with this delightful project:
The current occupant of the high chair is, in fact, a boy.  All that pink in the stripes makes this a rather girly high chair cover.  Currently this little man doesn't give a hoot.  And I'm keeping my fingers crossed that when Baby #3 makes its appearance in August we'll have a reason to keep the pink cover!


So, there you have it.  Two projects, less than $3 (if you include the cost of the elastic and ribbon I already had on hand; the tablecloth was closer to $2 when I bought it) and two satisfied little customers.

My work here is done. 

For now.