Wednesday, July 28, 2010

T Shirt Butterfly Mobile

I've been doing a lot of things with t-shirts lately, leaving me a nice big ol' bag of these:
T shirt scraps.  They're big enough pieces that I can't bear to throw them away, but too small to use for any of the bags or clothes I've been making lately.

I'm also 37 weeks pregnant, and the doctor says I could go any time...so yes, I am in baby mode.  Big time.  Which led me to make this....
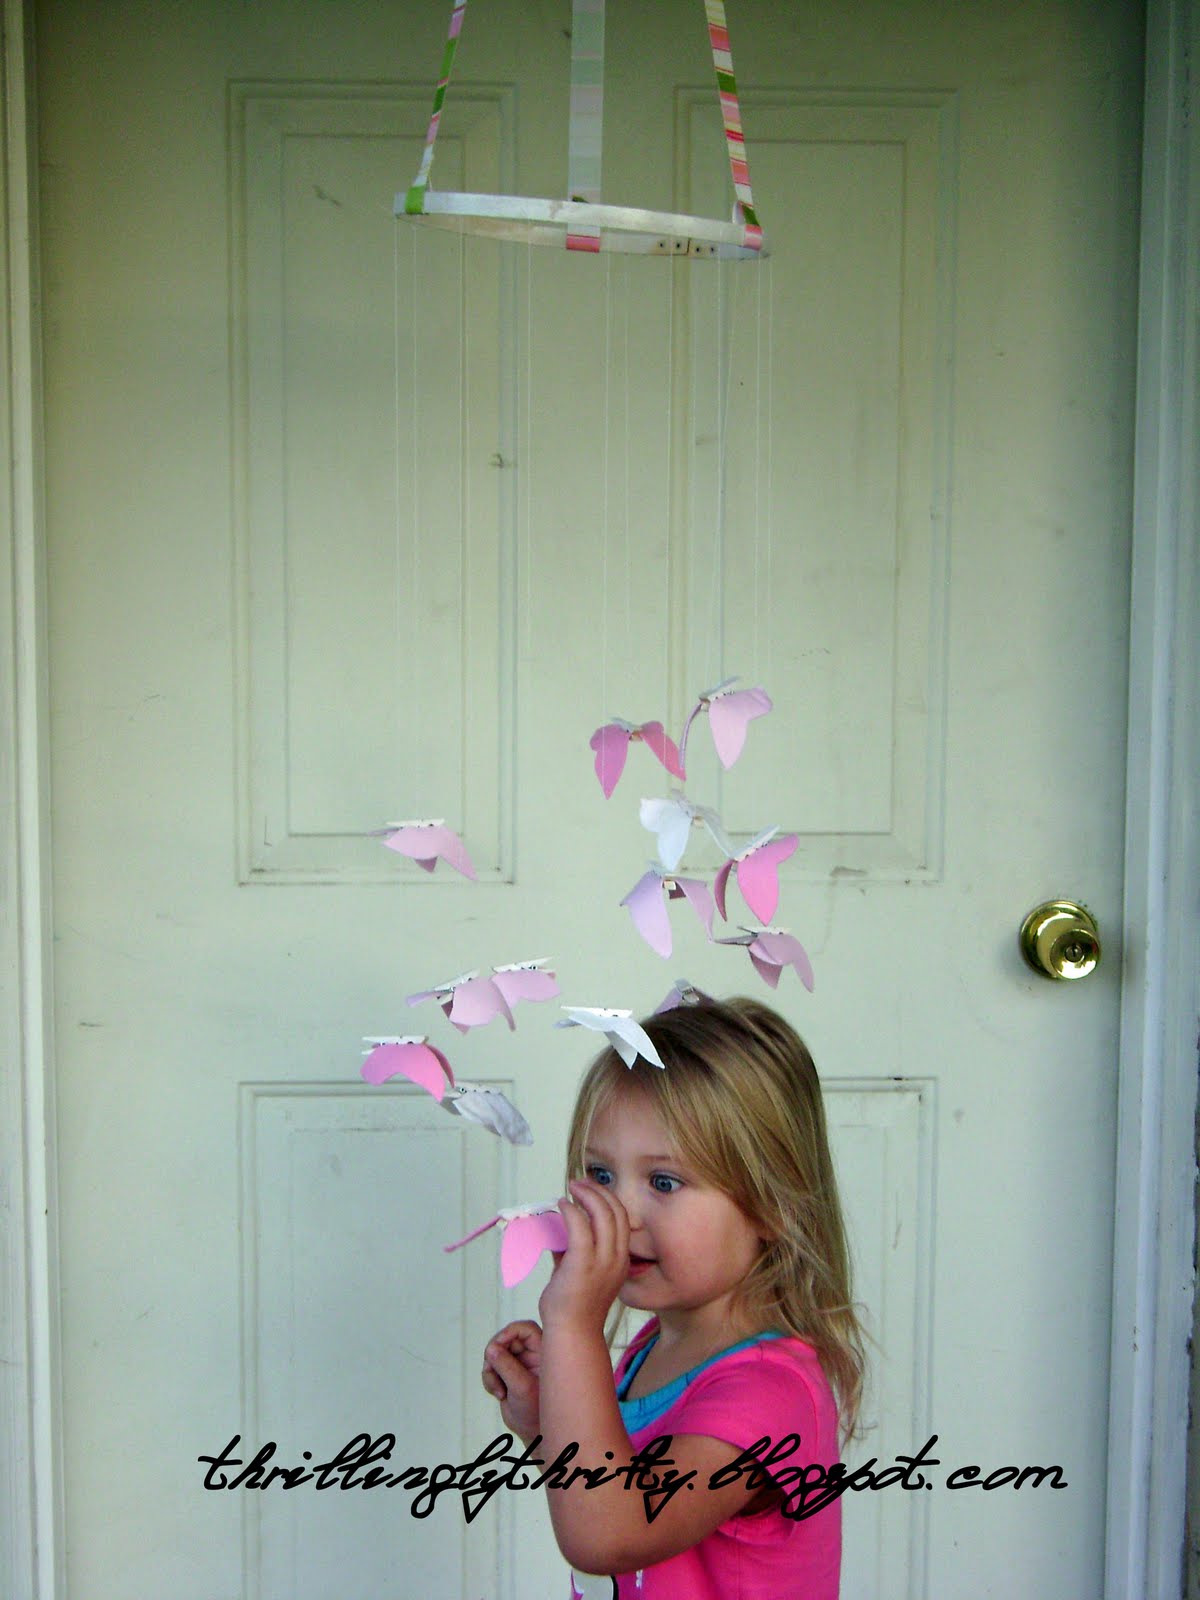
Butterfly Mobile!  (With my two year old Munchkin, of course...who should have still been in bed since it wasn't even 6 am yet!)

I've seen a number of buttefly mobiles lately, most of them made from scrapbook paper.  And I love them all!  But I dont have hardly any scrapbook paper, and even if I did I'd have to go to my mom's to use her Cricut...so I got creative and used what I had on hand.  (Mostly.)

First off, I took this idea from Sew She Sews' polka dot crib mobile tutorial.  (Seriously, click on that link and check out her mobile...if I wasnt so in love with butterflies right now I would have done the polka dots like she did!)  Anyways, I had just found two embroidery hoops at goodwill for $.50 each, and then got home and realized that the screw in one didnt work quite right.  But it would work PERFECT for this mobile!

And, I confess, I did run to the craft store to pick up one little thing that I didnt have on hand...
...miniature clothespins.  This isn't the smallest size they had, I think they are 1 3/4 in.  Then I spray painted them white.

Then there's the T shirt scraps.  Just alone, they would be too floppy to really look like butterflies, so I took one layer of scrap, put some Heat'N'Bond on it, then adhered it to another layer of scrap.

Then I spent what felt like FOR-EV-ER finding a butterfly template I liked (I ended up tweaking a few to make my own) and tracing and cutting out 14 butterflies.

Here they are with the clothespins clipped on:

The most tedious part was tying them on...I just used white thread.  I knotted around the middle of the clothespin, then tied it to the embroidery hoop.  I tried to stagger to create a "random" effect...I'm not so good at random.  But I think it turned out alright.

And this is what the baby will see:

I think I'll be replacing this ribbon with either plain white or light pink ribbon - again, just using what I had on hand.


Well, its a hit with my Munchkin at least!
Sorry, I know enough pics already!  But I just can never get enough of this little blue-eyed wonder (I have brown eyes, so it may be borderline jealousy) and her fascination in anything I make!


UPDATE:  I'm entering this in Iron Crafter Round 7: Clothespins!

And, in case you're wondering...my baby turned out to be a boy.  But he still likes staring at the butterflies!  (I'm thinking of re-doing them but in boy colors.  But we'll see.)


NightOwlCrafting

giveaways

Favorite%2BThings%2BFridaybig%2Bbutton.jpg
Join us Saturdays at tatertotsandjello.com for the weekend wrap up party!


I'm also linking to Craftastical's Share a Craft Link Party!


Friday, July 23, 2010

Diaper Bag

(Again, sorry for the crummy pics.  Too lazy to edit them!)

I found these pants at Value Village awhile back, priced at $7 but it was a 50% off day so it cost me $3.50.  I would never, EVER wear these pants.  But for some reason I fell in love with the fabric.  The orange-ish coral design, I just couldn't get enough of it!  (Which is weird because usually I'm more into the vintage-y look.)
So I bought it.  I started thinking it would make a really neat bag; a fun, snappy accessory because I could never bear to have that fabric be an article of clothing for myself.  (Although, now that I think about it I'm pondering some cute little girl outfits I could have made out of it...oh well.)

The only type of bag I carry around these days is a DIAPER BAG.  And I'm about due for a new one, I just couldnt find one in stores that I really liked.

So, with a little help from this tutorial (found via Preser Foot) I made myself a new diaper bag! 

I made it wider than the tutorial suggested with a bit longer straps.  I also didnt use canvas/home decor fabric, so I made the lining (which was just part of a white sheet) into quilted fabric.  And I didn't put a strip of contrasting fabric along the bottom, although I did want to.  I just couldnt because the background of the orange coral fabric is actually an off-white and all my fabric was just too white. 


Like I said, the lining is made from white sheet.  I quilted it with some batting (my first time really using batting; it was interesting!).  I also added some little details inside. Like a pocket, just big enough for diapers, with the other pocket being big enough to hold things like burp clothes and stuff.


Also inside is a little zippered pouch sewn on.  (I would have just done a normal pocket, but it was a last-minute addition and this way was easier.)  I was able to use the zipper from the original pants, and some of the leftover fabric from the pants.  Waste not, want not!

The front of my bag is my favorite feature.  When I was planning my bag, I asked my friends on my family blog what they liked best about their diaper bag.  One of my friends gave me the link to her diaper bag to show me this cool pocket thing that you can slide a blanket or coat or something through for easier carrying.
This is my attempt to mimic that genius.  I wasnt feeling up to another zipper, so I just made it a little pouch that I'm hoping will be perfect to hold my cellphone and keys.  But as you can see, the blanket slides right through.  Marvelous.

And speaking of blanket, I did make a baby blanket for this next kid.  Since we dont know for sure if its a boy or girl, I tried to choose colors that could go either way, but I just cant handle the yellows and greens.  I thought this blue with a chocolate brown would look great.

Too bad Joanns didnt have any chocolate brown in the silky that I wanted, and I was too impatient to wait.  But I found a remnant of that ivory color, so at 50% off I decided it would work fine.  OF course, sewing them together was another adventure...I've never sewn with slippery fabrics much!!  I thought I pinned it enough, but it still had issues.  Oh well, the baby won't care, right?  Plus I went ahead and appliqued a butterfly on it, in hopes that I'm right and it will be a girl.  If I'm wrong, however, we have enough of the blue to make another blanket and I'll get some more silky stuff....and then give it all to my mom to sew for me!!!!


So, there you have it.  My amazing diaper bag...not really.  Everytime I look at it I see something I could have done better or differently at least.  But right now I have no inclination to fix it, so it is what it is!


Baby outfit...I hope!

First off, sorry these are kinda crummy pics.  These projects are just kind of stay-busy-so-I-dont-get-too-anxious-for-this-baby-to-come, nothing special so I'm too lazy to take the time to Photoshop them. 

I'm hoping this will fit the baby when it comes (I'm also really hoping that the baby is a GIRL, but thats another matter altogether).  I keep looking at it and thinking no way is the baby that small!  If not, I guess my daughter's doll is getting a new wardrobe.

Before - a napkin from Goodwill.  $.50 
The napkin was a little thicker and rougher than I would like, but I fell in love with the strawberry plant design.  This was the first time I tried using elastic thread, and it was ...interesting.  If it had been different fabric it would have worked better I think.  (Plus it probably should have been a little wider, but I didnt want to piece in any fabric.)  As it is, I'm still in love.  My husband keeps saying how "adorable" it is!
Can I just say, my sewing machine does NOT like to applique?!  I had SO MANY issues trying to applique that little scrap onto the onesie - and I tried all the tips I could think of.  Iron-on interfacing, fabric underneath, paper on top...still it looks pretty crummy.  And its not centered, but at that point I really didn't care.  I just wanted to be DONE.

And the long strip is hopefully going to be a headband -I'm just waiting to see how big the baby's head is before I add elastic.  (My kids tend to be big but have small heads.)

Maternity Shirt makeover

A few months ago, when the weather was starting to warm up, I broke down and bought myself some new maternity shirts.  (Both my other kids were born in April, so all I had were winter maternity clothes; plus they were getting a little worn out.)

Still trying to be thrifty, I chose from the clearance rack at Motherhood Maternity.  I found a shirt very similar to this one, but all white:
Now, I know this shirt looks fine on the model here.  But we're not all models, are we?  Thanks to my ever-expanding rack, I was just barely too big for a Large, so I went up to XL.  I'm glad I did in the fact that it was loose enough in the chest so that it wasnt uncomfortable, but it just was not fitting right in the sleeves. 

I think I wore it for a whole 15 minutes one day before I decided I couldnt handle it anymore.  After another month I got brave and decided to refashion it; if it didn't work out, I wouldn't be any worse off since I wasnt wearing it anyways!

Luckily, it DID turn out...its now one of my favorite shirts!  (Except for it being white...I always manage to get something on the belly!)

I actually made these flowers from the maternity shirt I had from my brother's wedding 2 1/2 years ago.  The shirt got some weird brown stain on the belly at the reception, so I've never worn it since.  But I love the color, so I kept it in hopes of finding a use for it.

And, as you can see, I changed the collar.  I was a little nervous about doing that, but I was just not liking the usual collar.  It was really easy, I just had to unpick the seam, remove the offending collar, and then I slid some ric-rack in there and topstitched it.

As for the sleeve, what had been bothering me was the cuff.  It was 3/4 length and so it hit below my elbow.  But because it was so big it just always looked too poofy to me.  (And it had some buttons which didnt look good.)  So I cut it to a short-sleeve length, and then using some of the material I'd just cut off, I made some new cuffs.  And, of course, slipped in some more ric-rac before topstitching!
My favorite thing about this project is that it didnt cost a dime to make - I had everything just sitting around!  And, actually, the ric rac is VINTAGE...ever since I've started really getting into sewing my grandmother keeps bringing over little bundles of goodies that she's found.  (She's got lots of sewing stuff herself, but then both her mother and her mother-in-law died within a few years of each other and she seems to have gotten most of all THEIR sewing stuff too.  And they lived through the depression, so they kept EVERYTHING.  I am getting so spoiled living so close to my family!!!)

Friday, July 9, 2010

This morning I tried to have a "photo shoot" with my Munchkin in one of the new dresses I made for her.


It didn't go so hot.

But, at least the dress is finally finished - its been sitting half done in my craft area for almost a month.  Maybe we'll try the pictures again tomorrow.

Wednesday, June 30, 2010

I was featured!

Woo Hoo!!!!!

Last week was the first time I've really done a whole bunch of link-up parties for one of my projects, and it was a lot of fun!  I'm one of those people who are absolute suckers for comments, so it was fun to have random people stop by and say something about the T Shirt bags.  (I just wish I had the time to comment back for everyone, but my kids have been rather...demanding as of late.)

Anyways, Night Owl Crafting decided to feature the T Shirt bags after the Hoo's Got Talent? link up party!!!!!  How exciting is that?!?!?!

Well, I'm pretty excited, if you couldn't tell.  Really excited.  It makes me wish I'd been more productive this last week so I could link up something new to this weeks party!

Thanks Leslie for featuring me!  It totally made my day, which was actually going kind of crummy before this!

Tuesday, June 22, 2010

T Shirt Bags - How-to!


Yesterday I posted about my T-Shirt bags adventures, and last night I whipped out another one for a Service Auction at church tonight, so I tried to write down what I did and take some pictures along the way.  I hesitate to call this a 'tutorial' because it is nowhere NEAR as good of instructions as most tutorials out there, but hey, its my first one!

So, here we go.

First off, you need to choose your T-Shirt.  This is my cheap Walmart 4th of July shirt from last year.  It says
2009 on it, so I figured I wouldnt be wearing it again much.  MY ADVICE: if you're following the measurements I give, you're probably going to want to use an Adult L or even bigger.  This was a Women's L, and I was scrounging for pieces.  I really like to use Men's XL shirts - you can get two smaller bags out of those pretty easily, or a bigger one but with a lot easier measuring and cutting. 


Next you need to cut your pieces.  I've done a number of sizes and styles, but here's the measurements for the bag I made last night:
-(2) Rectangles 12" by 14" You can't tell in the picture, but I cut the rectangles' short side (12") along the bottom hem of the shirt - try to do this if you can!  It saves time and looks kind of neat.
-(2) Handles 14" by 2"
-(2) Strips for Ruffles 2.5" by 24"

Some quick notes: the handles should be wider (and you'll see why in the next step) and I would have liked them a little longer, but you gotta work with what you've got! 
I wish I could show you exactly where from the T-Shirt I cut each piece out, but other than having the rectangles line up along the bottom hem, the pieces were kinda all over the place.  And each bag I've made has been cut out slightly differently - so I dont think there's a right or wrong way.  I just try to cut both ruffles the same (either running vertically on the shirt or horizontally on the shirt) and both handles the same; if you don't the pieces might sew different and look mismatched.

TO MAKE THE HANDLES
The easiest way to make the handles is to take one handle, fold it in half with the right sides together, sew the long end, then turn it right-side out.  But like I said above, I didn't have enough fabric to do very wide handles - I think you need them to be at least 3 " wide, although I prefer closer to 4".  Otherwise, its VERY difficult to turn them rightside out.
So here's how I made these handles, and I just want to say now that it was NOT a very easy way to do it.  I'm sure someone else out there has a better way to sew these things.

1. Press the bottom edge up so that it hits about the middle of the strip. 
2. Press the top down so that it hits just below the middle of the strip.  (It should overlap some.)
3. Stitch down the center.  Your goal is to be sewing both overlapped pieces, and hopefully still be in the center.  You may want to pin the flaps in place a bit before you start sewing, since it tends to move easily.

Like I said, definitely not the best way to sew handles, but you gotta do what you gotta do.

TO MAKE THE RUFFLE
If you've ever ruffled before, you know what to do.  But in case you haven't here's what I did:
(sorry for the blurry pics!)

I moved my needle to the right, put the tension at the highest setting, and then chose the longest stitch length.  Now, each shirt sews a little differently; for some of my other bags the highest tension setting ruffled it just right so I didn't have to adjust it much when I was lining it up with the rectangles (you'll see in the next step).  For this one, it ruffled it just a bit too much, so I ended up turning the tension down to '8' and it worked great.  My advice is to make sure to leave long enough thread 'tails' to allow adjusting.

Okay, now just line up your foot along the long edge of the ruffle strip and start sewing!  The machine will do the gathering for you.  (You can't see it in this pic very well, but the needle is in the 'right' position setting; I did this to allow for a bigger ruffle.  I think it would be fine if you left it in the middle setting, too.)

Then, you flip it over and ruffle the other side in the same way.  (If you want it to look like this bag I showed you yesterday, you would just ruffle the one side.)

And here's your ruffle!
(Or caterpillar, as my 2 year old calls it.)

ATTACHING THE HANDLES

Pin your handles to the RIGHT SIDE of your rectangle; the side that will be the outside of your bag.  (If you were able to use the bottom hem of the T Shirt for your rectangle, that will make it easy to tell which is the right side.  Oh, if you couldn't/didn't use the hem, you might want to sew a quick hem on the 12" side of the rectangles at this point.  It looks nicer that way.)  The bottom edge of the handle should extend 3/4"-1" past the stitching of the hemline.
Stitch straight across the bottom of the handle.  (Make sure to change your tension and stitch length back to normal.)  I even backstitched over it, just to make sure.
Do this for both ends of both handles.

SEWING ON THE RUFFLE
Okay, now comes the part that I may have trouble explaining, especially since I didn't take as good of pictures as I thought I had.  Bear with me.

Place your ruffle on top of the rectangle with the right sides together.  Line up the stitching where you ruffled just below the hem of the T Shirt.  Pin this ruffle in place; and don't go stingy on the pinning!  Its better to have a few too many than a few too...few.

Here's what it should look like pinned:

You can't really tell, but the ruffle extends above the hem, and also you're seeing the "wrong" side of the ruffle.  I know, they look pretty much the same, but up close there is a difference!
Also, try to let the ruffle extend over the side edges a bit; I didn't get a good pic of this, but when you sew your two rectangles together you want them to be long enough to 'catch' in the seam.  This is where having those thread 'tails' comes in handy, you can gently easy out the ruffle a bit to make it long enough.

Okay, now you're gonna sew this baby on!  I didn't take any pics of this, so I'll try to just explain.  You're going to sew along the bottom edge of the ruffle, just on the other side of the stitching you have from ruffling.

Confusing?  Hmmm, lets see if I can photoedit to show you what I mean...


See the white dotted line?  That's where you're going to sew.  And the gathering for the ruffle is right below that.

Okay, now you fold the ruffle down, so that the right side is now facing up.  You can press it down with an iron if you like, although I've done it without and it was okay too.

Stitch down the bottom of the ruffle.  (This stitch will be visible.  I can't figure out how to have both the top and bottom stitching hidden; if you know PLEASE let me know!)


In this pic I tucked the bottom edge underneath, so you won't see the rough edge or the gathering stitch.  It's faster and easier to not tuck it under and just sew right on top of the gathering stitch, but it gives it a different look, like this:

(Make sure to repeat these steps for the second rectangle too!)

FINISHING THE BAG
Now comes the easy part: with right sides together, sew the two rectangles together, leaving the top (with the handles) open.  I used a large zig zag stitch.  The ends of the ruffle should overhang and 'catch' so that when you turn it right side out you shouldn't have a rough edge.  (You may need to trim the excess ruffle from the inside.)

Turn right side out, and you're done!  Unless of course you want to decorate it...then you're just getting started!

(I used some red and white scraps from other T-Shirts to make the stars, with a little help from Heat-N-Bond.)

Click here to see my post yesterday.  It shows a couple little variations, plus the lovely painting my two year old did!


MuralMaker and More

Join us Saturdays at tatertotsandjello.com for the weekend wrap up party!

(Okay, I also linked up to Craft Spot Challenge found here but I'm having issues getting that button to work!)